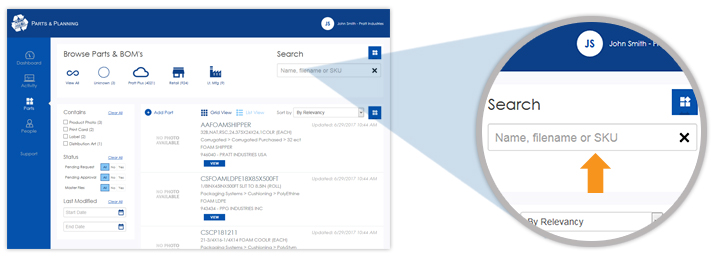
Finding a part
On the parts page you can enter in the SKU, part number, or part name in the search bar and use filters on the left hand side to reduce the number of results.
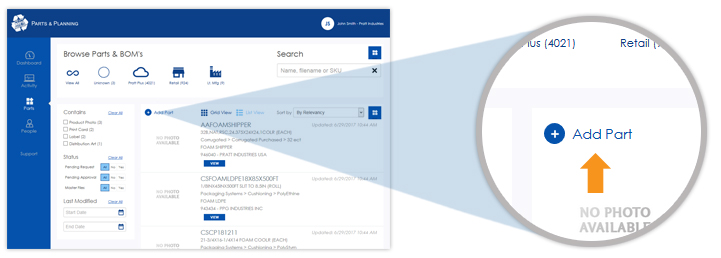
Creating a new part
New parts are created by clicking "Add Part" within the parts section which will prompt you with a dialog box for adding the new part's mandatory properties.
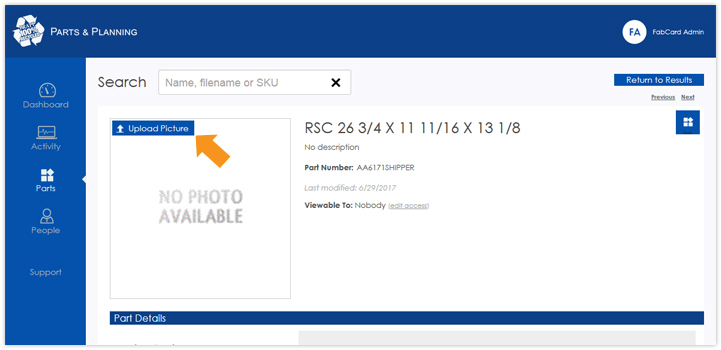
Where do I add/update a part photo?
Setting a part's photo (or updating) is done by going the part detail and moving the cursor over the top left image ("No Photo Available" for new parts) and clicking on the "Upload Picture" button. Alternatively, you may drag a photo from your computer into the photo box to start the upload.
I need to manage part information, where and how can I go about this?
Part data is split up into sections; Part setup, bill of materials, products, part cost, part dimensions, part attributes, and inventory.
Editing data under part details can be done by clicking on the "Edit" link next to the data you wish you change.
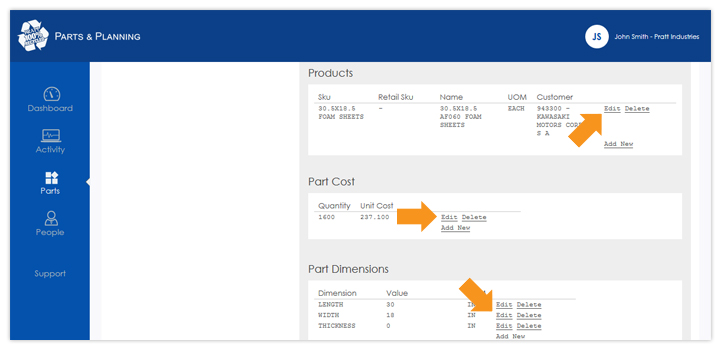
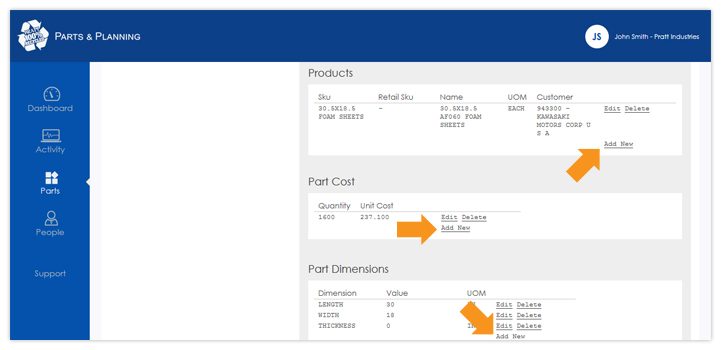
If you need to add new data to a section click on the "Add New" link and fill out the information requested in appropriate input boxes.
To finalize the new addition click on the "Save" button and the new item will appear as a new row in the data section.
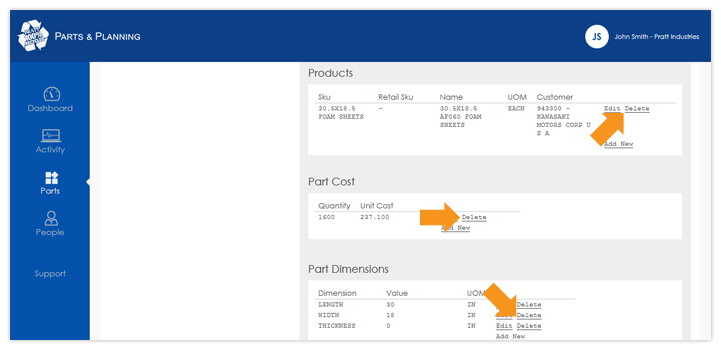
The "Delete" link will remove the data row from that section.
Items that are already stored in the AS/400 will receive a strike through so that they may be undeleted.
Why is some information crossed out or highlighted in different colors?
The status of a part is indicated by the color of the highlight or by line-through with faded text for items removed from the system.
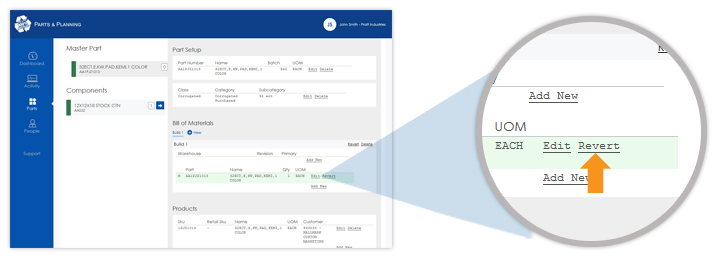
- Light Yellow: Existing data in the AS/400 has been modified and may be reverted
- Light Green: New data does not yet exist in the AS/400
- Line-Through: Exisiting data is removed, but the AS/400 still contains it. This may be undeleted.
Can I cancel or revert my changes I made to a part?
When you make a change to part data, the item will take on a light yellow highlight.
Any existing data that has been changed in the AS/400 may be reverted using the "Revert" link or undeleted using the "Undelete" link.
New data that has not yet been put into the AS/400 will have a light green highlight, and this data may only be permanently removed.
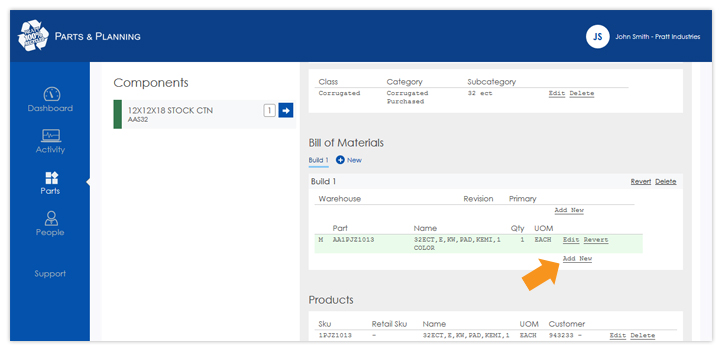
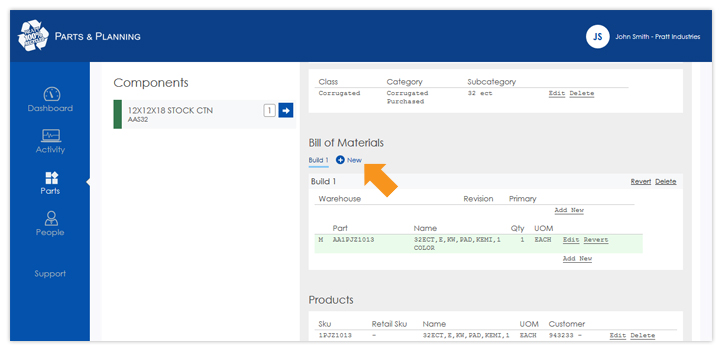
How do you create or edit a bill of materials (BOM)?
Creating a BOM for a master part is managed under the bill of materials section of the master part.
If a BOM does not yet exist, then a BOM will be created by either:
- 1. Associating the build to a warehouse
- 2. Adding a component to the build
- 3. Changing the build quantity of the master part
To add a component to the build, click on "Add New" and select a component along with the required build quantity.
If the component does not already exist in any of your builds for the master part, you can associate a new component by selecting
"Add New Component" in the dropdown.
When adding a new BOM component, a dialog will be presented in which you can find an existing part in the system or create a new part. When creating a new part you will be asked to fill in similar information as discussed in
the Creating a new part question above.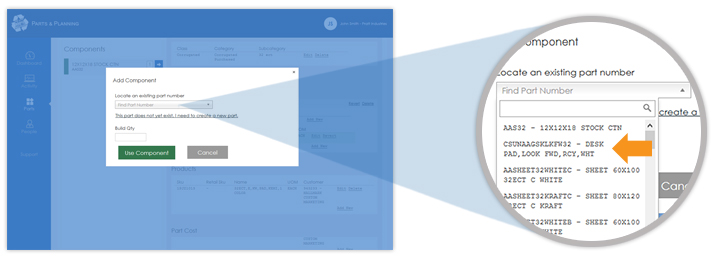
Multiple builds are supported to handle different revisions. Revisions numbers in each warehouse do not need to match the build number. Creating a new build also creates a distinct fabcard for that build. To create a new build, click the "New" button next to the current build tabs.
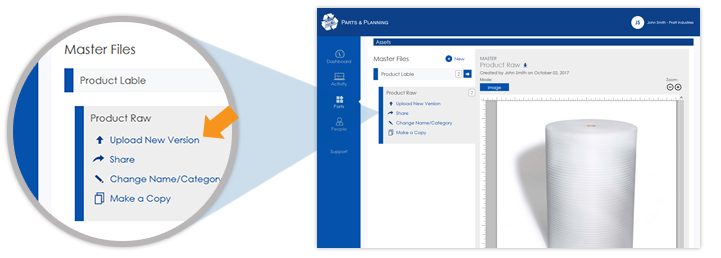
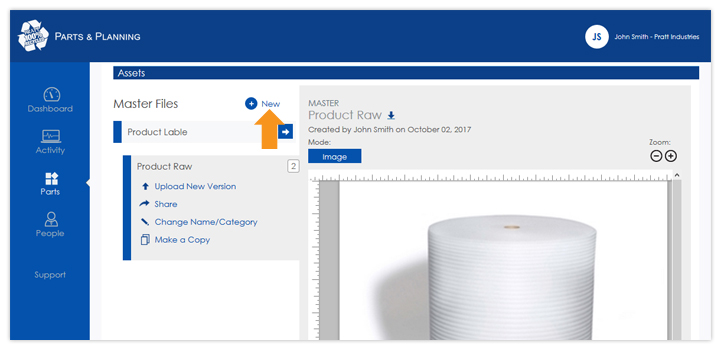
What are assets and how do I upload them?
Assets represent text and picture information for the master part. Assets for the master part along with assets for any build components will be automatically included in the default fabrication cards. Information can be added to the assets during the fabcard design process.
You can upload an asset file by dragging it from a file folder to the assets area on the screen, or clicking the "New" button in the assets section.
Modifying an existing asset can be done by clicking on an existing asset in the left sidebar and selecting the "Upload New Version" link. All uploads of an asset are stored and may be retrieved at a later date.
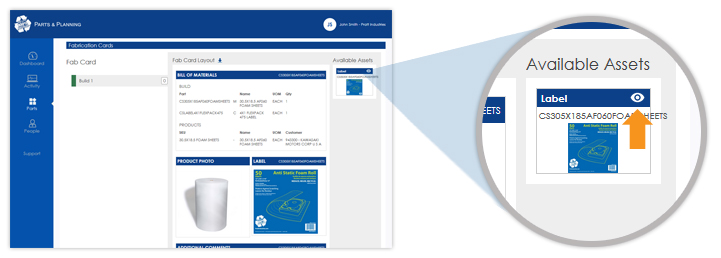
Where did the items in the fabcard come from and how do I add more?
When an item is added into the bill of materals, all assets that are part of that item are brought into the fabcard layout.
You can add additional assets to the current fabcard by uploading new assets to the part detail screen of the master part or the part detail screen component part.
How do I hide an asset from a master part or component without removing it?
Assets can be marked as hidden or non-visible by clicking on the "Eye Icon" under available assets.
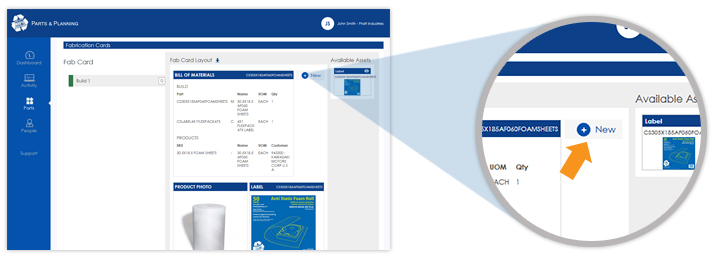
How do I add a comment section to a fabrication card?
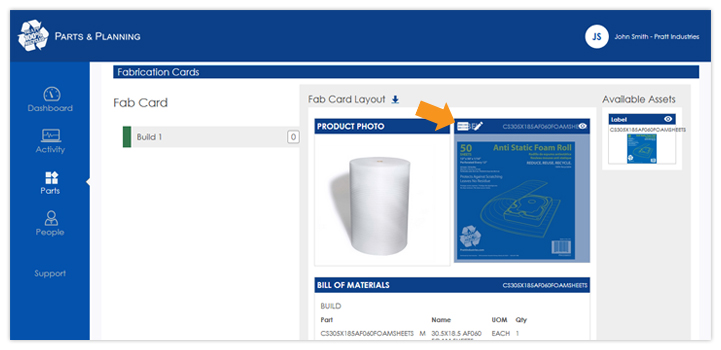
All assets allow additional data to be included by clicking on the "Edit Icon" after hovering over the fabcard item.
Additionally, you can add a data-only section that does not require an asset by clicking on the "New" link after hovering over an empty section.
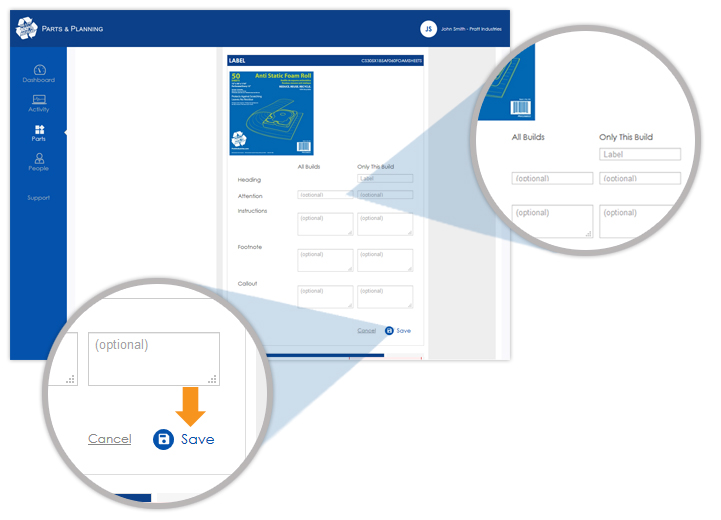
What is "Only This Build" and "All Builds" when editing fabrication card data?
Information saved in the "All Builds" column will appear on any fabrication card that contains this asset.
Information saved in the "Only This Build" column will only appear on the current fabrication card.
How do I arrange the items in the fabcard? How do I manage pages?
You can arrange the fabcard into as many rows as you want with each row having a maximum of two columns.
You can move the fabcard items by hovering over the item you want moved, click and grab the "Handle Icon" to drag to a new section or page.
Drag into the "Insert New Page" on the upper or lower right of a page to insert the item into a new page.
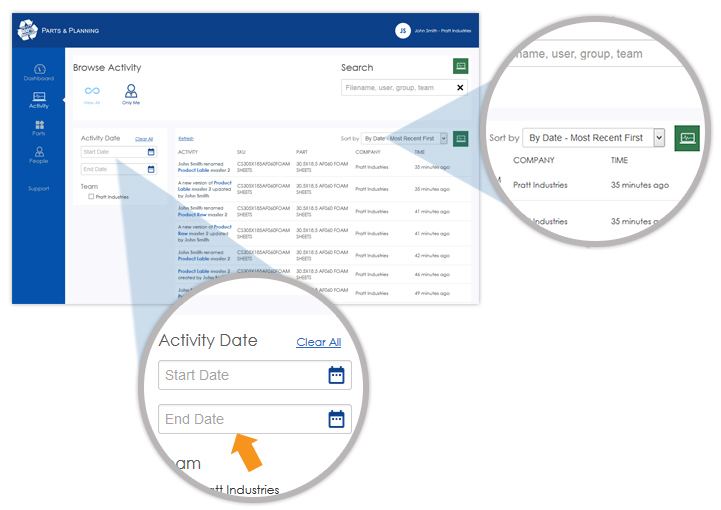
How do I view historic activity?
By clicking the Activity tab on the navigation menu, you will have access to your historical activity feed. You can view the data by newest or oldest entries, by clicking the "sort by" drop down in the upper right hand corner. You can filter your entries by using the date and team filters on the left hand side.
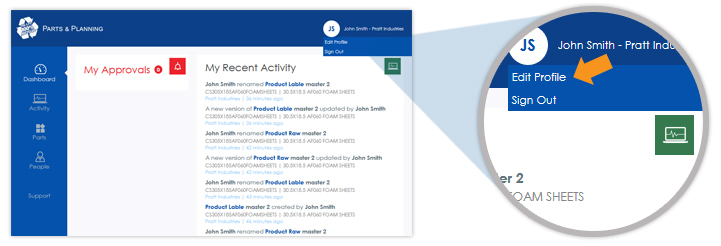
How do I change my profile information?
After logging in, there will be a hover-able section with your name in the upper right hand corner of every screen. Hover over this and a drop down will appear. Clicking the “edit profile” link will allow you to change your email address, first name, last name and phone number or password. Clicking “update” will save any changes that you make.
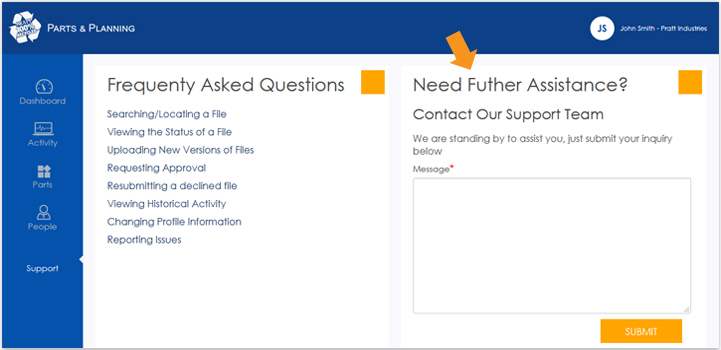
How do I report an issue?
You can request support, suggest changes, or report issues using the Support feature on the navigation menu. Fill out your desired request using the form in the upper right hand side of the page and it will be sent to the developers for further review.